
Reverse Engineer Firmware with Ghidra and AI in Antigravity
Recover logic from a firmware .bin with Ghidra, then let an AI agent in Antigravity help rename, explain and map it. Setup, prompts and limits.
Last reviewed: October 2026 | Technical Guide
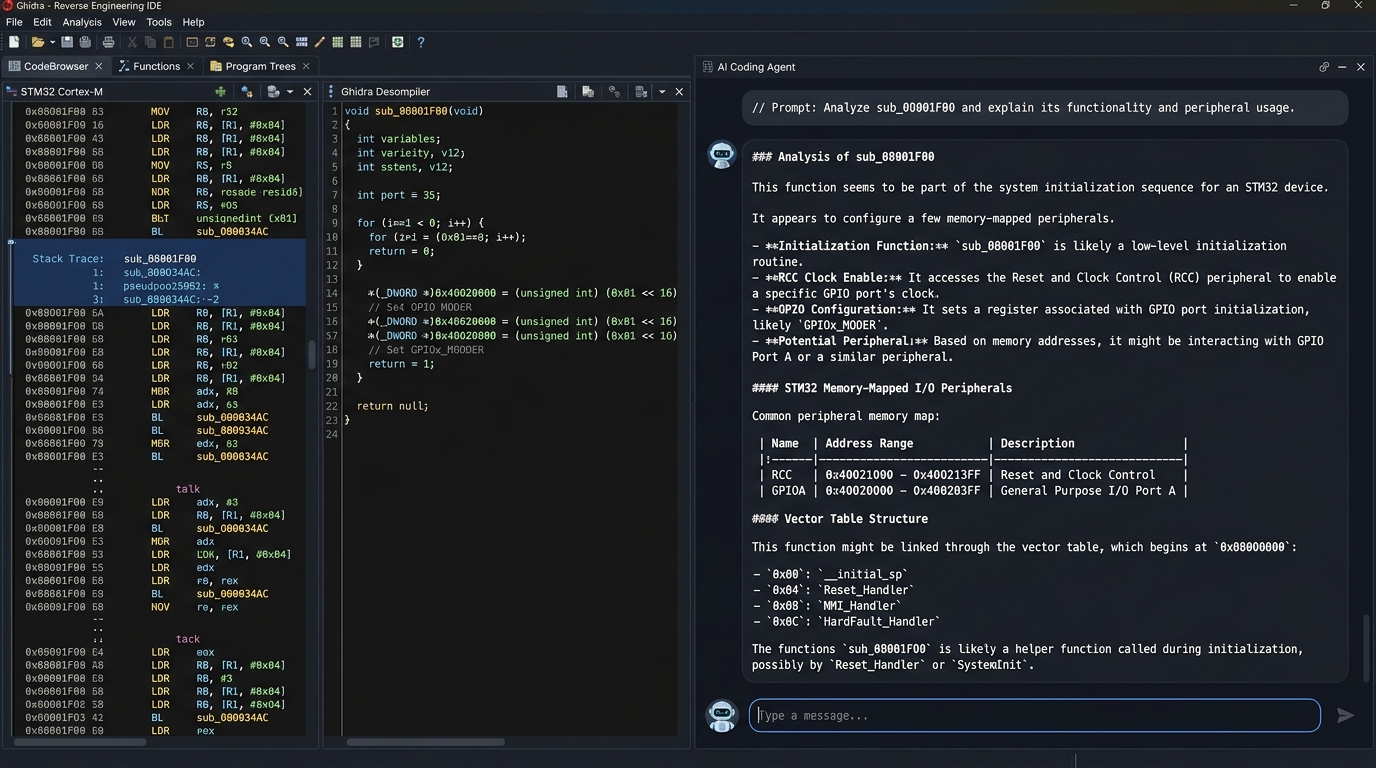
You find an old .bin on the bench. The source repo is gone, the engineer who wrote it left, and the device still has to be maintained. Or you inherited a vendor update file and need to know what it really does before you flash it into a product. This is where reverse engineering tools earn their place in an embedded engineer's toolbox.
Here is the honest version up front: you will not get your original source code back from a binary. You will get disassembly and decompiled pseudo-C, and that is enough to understand a lot. An AI agent connected to the decompiler can speed up the boring parts (naming, explaining, summarizing) so you spend your time on the hard parts. This guide shows the workflow, how to connect Ghidra to an AI agent inside the Antigravity IDE, and prompts you can copy.
Video Walkthrough: AI Reverse Engineered My ESP32 Firmware
Watch our step-by-step companion video from the A IOT Bot YouTube Channel, demonstrating the hands-on process of recovering logic and peripheral routines from an ESP32 firmware binary without original source code:
Table of Contents
- Video Walkthrough: AI Reverse Engineered My ESP32 Firmware
- What You Can (and Can't) Get Back From a Binary
- Use It Responsibly
- The Workflow in Seven Steps
- Set Up Ghidra With an AI Agent in Antigravity
- Copy-Paste Prompts
- Common Mistakes
- Frequently Asked Questions
- Conclusion
What You Can (and Can't) Get Back From a Binary
Ghidra is a free, open-source reverse engineering framework released by the NSA in 2019 under the Apache 2.0 license. It reads machine code and shows you assembly and a C-like decompilation. Compilers throw information away during optimization, so some things are gone for good:
| You can usually recover | You usually cannot recover |
|---|---|
| Function boundaries and the call graph | Original function and variable names |
| Strings, constants and lookup tables | Comments and original file layout |
| Which peripheral registers are read or written | Macros, #define names and enums |
| Control flow, loops and state machines | Exact types and struct definitions |
| Protocol structure (command bytes, CRC use) | Code the compiler removed or inlined |
An AI agent helps with the left column: it can read a decompiled function and say "this looks like a UART receive handler with a ring buffer", propose names, and summarize what a hundred functions do. It cannot know what the original author named things, and it can be confidently wrong. Treat every AI answer as a hypothesis you check against the disassembly.
Use It Responsibly
Reverse engineering is a powerful skill, so use it where you have the right to.
- Good uses: recovering source for firmware you or your company wrote, understanding a binary you are licensed or permitted to analyze, security auditing with permission, learning on your own builds and open-source firmware.
- Check first: your employer's policy, the product's license, and the laws that apply where you live. This article is not legal advice.
- Do not use these techniques to bypass read-out protection, defeat licensing or copy protection, or redistribute someone else's code.
- AI privacy: when an AI agent reads decompiled code, that text is sent to whichever model your IDE uses. Do not feed proprietary or confidential firmware to a cloud model unless you are allowed to. If in doubt, use a local model or skip the AI step.
The Workflow in Seven Steps
- Identify the chip and the image format. Know the architecture and byte order before you open anything. A Cortex-M part is little-endian ARM, an ESP32 image has a header and several segments (inspectable using
esptool.py image_info firmware.bin), and an AVR.hexfile is text that must be converted to binary first. - Start from a legitimate image. Use your own build output, a dump from a device you are authorized to read, or an update file you are licensed to analyze. If the chip has read-out protection enabled, stop there; this guide does not cover bypassing it.
- Import into Ghidra with the right language and base address. For a raw
.bin, select Raw Binary format, click the language selector and chooseARM:LE:32:Cortex(ARM Cortex 32-bit little-endian), then click Options... to set the flash Base Address. Many STM32 parts map internal flash at0x08000000. On a Cortex-M, the first 32-bit word of the image is the initial stack pointer and the second is the reset handler address (an odd value means Thumb code). If the vector table looks like garbage, your base address or language is wrong. - Add the peripheral map. An SVD file from the chip vendor lets a Ghidra extension like SVD-Loader-Ghidra or GhidraSVD name registers, so
*(uint32_t *)0x40013804becomes something likeUSART1->DR. This one step makes decompiled embedded code far easier to read. - Run auto-analysis and orient yourself. Look at the entry point, the interrupt vector table, strings, and the main loop. Rename what is obvious.
- Connect an AI agent through MCP. The next section shows how.
- Rename, comment, verify. Ask the AI for proposals, approve the good ones, check each against the disassembly, and write down what you learned. If you rebuild a project from it, test on real hardware.
Set Up Ghidra With an AI Agent in Antigravity
MCP (Model Context Protocol) is the standard that lets an AI agent call tools, in this case Ghidra's. Two open-source Ghidra MCP servers exist at the time of writing: GhidraMCP and ReVa. Install one. (If you need a unified MCP server covering firmware image extraction and logic analyzers alongside Ghidra, see our Reverse Engineer Anything: REA and AI Agents Guide).
Tested with: Ghidra 11.2, GhidraMCP (latest git), Antigravity 2.0 on Windows 11 (October 2026; GhidraMCP tested with local uvx bridge).
Prerequisites
- A working Ghidra install (it needs a compatible JDK; follow the Ghidra install guide for your version).
uvor Python 3.10+ if you use GhidraMCP's Python bridge.- The Antigravity IDE.
Option 1: GhidraMCP
- Download the latest release from the GhidraMCP repository that matches your Ghidra version.
- In Ghidra, go to File > Install Extensions, click +, select the extension zip, and restart Ghidra.
- Go to File > Configure > Developer and make sure the GhidraMCP plugin is enabled. The plugin's local server defaults to
http://127.0.0.1:8080/, and you can change the port under the tool options. - Open your firmware in Ghidra's Code Browser so there is a program for the AI to talk to.
Option 2: ReVa
- Install the ReVa extension with Ghidra's extension manager. Its README says it supports Ghidra 12.0 and above.
- Enable the ReVa plugin in the project view and in the Code Browser (File > Configure > Configure all plugins), then save the tool so it loads by default.
- ReVa listens on port 8080 by default and speaks the streamable HTTP transport.
Add the server to Antigravity
In the Antigravity IDE, click the … menu at the top of the agent side panel, choose MCP Servers, then Manage MCP Servers and View raw config. You can also edit the file directly: ~/.gemini/config/mcp_config.json applies everywhere, and .agents/mcp_config.json inside a project applies to that project only.
For GhidraMCP, add a local server that starts the bridge:
{
  "mcpServers": {
    "ghidra": {
      "command": "uvx",
      "args": [
        "--from",
        "git+https://github.com/LaurieWired/GhidraMCP",
        "ghidra-mcp",
        "--ghidra-server",
        "http://127.0.0.1:8080/"
      ]
    }
  }
}
For a server that is already listening over HTTP, such as ReVa, Antigravity uses the serverUrl field (the older url field is not supported). Check the ReVa README for the current endpoint path:
{
  "mcpServers": {
    "reva": {
      "serverUrl": "http://localhost:8080/mcp/message"
    }
  }
}
Save, reload the MCP servers, and test with a simple request: "List the first 20 functions in the open Ghidra program."
Keep it safe
- Stay on localhost. ReVa's README warns that its scripting tools are enabled by default; if you ever expose it beyond your own machine, turn on API key authentication or disable scripting.
- Keep approvals on. Antigravity asks for your approval before running MCP tools unless you have allowed them. Leave that on for your first sessions so you see what the agent does.
- Hide risky tools. The
disabledToolssetting in the config hides specific tools from the model. Consider hiding anything that can run scripts or change the project until you trust the workflow. - Work on a copy. Duplicate the Ghidra project before letting an AI rename things.
Copy-Paste Prompts
Fill in the parts in square brackets. Paste them into the Antigravity agent panel while your program is open in Ghidra.
1. Read-only orientation (start here)
You are helping me analyze a firmware image that I own or am authorized to analyze. Work read-only: do not rename, retype or modify anything in the Ghidra project unless I say so.

Target: [CHIP, for example STM32F103, little-endian ARM Cortex-M]. Flash base address: [0x08000000].

1. List the program's memory blocks and the entry point.
2. Read the vector table at the base address. Give the initial stack pointer, the reset handler, and the first 15 exception and interrupt handlers with their addresses.
3. List the 30 most interesting strings (error messages, protocol keywords, version text) and the functions that reference them.
4. Identify the likely main loop and the functions it calls.
5. For every finding, say whether it is certain (backed by code or data you read) or a guess.
2. Propose names (approve before applying)
For the functions below, propose descriptive names using only evidence in the decompiled code (strings, constants, register accesses, call patterns). For each one give: address, proposed name, confidence (high, medium or low), and the specific evidence. Do not apply any rename yet. I will approve the list first.

Functions: [paste addresses, or "every function that references the string 'ERR'"]
3. Peripheral map
Find every read and write to memory-mapped peripheral addresses in this program (on a Cortex-M that is roughly 0x40000000 to 0x5FFFFFFF). Group them by peripheral, using the SVD register names if they are loaded, otherwise by address range. For each peripheral list which functions use it, which registers are written, and what that probably configures (for example UART baud divisor, GPIO mode, timer prescaler). Mark every guess as a guess.
4. Explain one function
Explain the function at [ADDRESS] in plain English. Give: what it does, its inputs and outputs, which globals and peripherals it touches, and any loops or timing assumptions. Then list three ways your explanation could be wrong and what to check in the disassembly to confirm each.
5. Find commands, protocols and tables
Look for a command parser, state machine or lookup table in this program. Check switch statements with many cases, arrays of function pointers, and constant tables. Describe the message format you can infer (start byte, length, command, payload, checksum or CRC) and list the evidence. If a CRC is used, tell me the polynomial and initial value if you can find them.
6. Readable C skeleton (with honesty)
Write a C header and function stubs for the functions I approved, using the names we agreed on. Keep unknown parts as comments marked UNKNOWN. Do not claim this matches the original source. Add a comment on each function saying which address it came from.
7. Self-check
List every claim you made in this session that you are less than sure about. For each, say what evidence in the disassembly, a datasheet or a test on real hardware would confirm or disprove it.
Common Mistakes
- Wrong base address. Everything looks like nonsense. Re-check the vector table and the chip's memory map.
- Trusting AI names. A confident name is still a guess. Keep the evidence next to it.
- Forgetting the peripheral map. Without register names, the AI is guessing from raw addresses.
- Encrypted or protected firmware. If the image is encrypted or compressed, you will see high-entropy data and no sensible code. That needs the right tooling and the right to analyze it.
- Skipping hardware tests. A decompiled function can look right and still hide a timing detail. Test on a real board.
Frequently Asked Questions
Can I recover my original source code from a firmware binary?
No. You can recover readable logic as decompiled pseudo-C and assembly, but names, comments, macros and structure are lost. Rebuilding a project from it still takes engineering work and testing.
Does this work for ESP32, STM32, AVR and PIC?
Yes. Ghidra natively supports ARM Cortex-M (including STM32), AVR8 (Atmel/Microchip), PIC18, and RISC-V (such as ESP32-C series). In Ghidra 11.0 and later, native support for Tensilica Xtensa was also integrated into the official distribution, allowing direct disassembly and decompilation of classic dual-core ESP32 and ESP8266 binaries without requiring third-party plugins.
Do I need AI to do this?
No. Ghidra works fine without it. AI saves time on naming, summarizing and spotting patterns, and it makes mistakes that you must catch.
Is my firmware uploaded somewhere?
Ghidra runs on your computer. When an AI agent reads decompiled code, that text goes to the model your IDE uses. Check your employer's and the firmware's license terms before using a cloud model.
Conclusion
Reverse engineering a firmware image is detective work: identify the chip, load the image correctly, name the peripherals, and then read the code. An AI agent connected to Ghidra through MCP does not replace that skill, but it removes hours of repetitive naming and explaining, and it works best when you give it clear, read-only prompts and verify its answers. Start with a binary you built yourself, so you can compare the result with your own source and learn where the decompiler and the AI are strong and where they guess.
Found a baud divisor, a CRC polynomial or a bit mask while reverse engineering? Check your numbers with our UART Calculator, CRC Calculator and Bitwise Calculator, convert addresses with the Number Base Converter, pick a chip with the ESP32 Chip Selector, and browse everything on our Tools page.